


August 4, 2012
DIY Weekend Project: Add Texture to Your Kitchen With a Wine Cork Backsplash
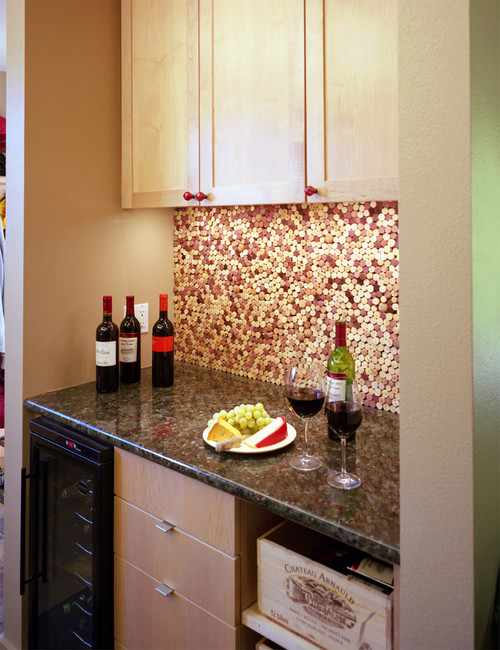
Are you looking for a project involving all of the wine corks you have been saving? Try creating a wine cork backsplash for your kitchen.
Things you’ll need:
- Measuring Tape
- Hot Glue Gun
- Utility Knife
This is an effective way to get a larger surface area, too, because you will end up with double the amount of corks.
Step-by-step instructions:
- Measure the dimensions of the backsplash area in your kitchen.
- Slice the corks in half, lengthwise, with a utility knife. The flat side of the cork will be pressed up against the wall, while the rounded side will face out.
- Glue the wine corks together by rows using the hot glue gun.
- Glue the individual rows together by applying glue from the hot glue gun in between the rows. Attach the rows until you reach the desired width for your backsplash. Allow the backsplash to dry for at least 24 hours before mounting.
- Mount the backsplash to the section in the kitchen where you wish to hang it, flat end against the wall. You can use the hot glue gun to mount it, since wine cork is lightweight, by applying the glue directly over the tile of the wall and pressing the backsplash into it. Hold the backsplash in place with your hands until it feels strong enough for you to let go.
Adding a Wine Cork Backsplash in your kitchen is an effective way to add texture to your space.
Click here for more DIY Weekend Projects.
(Visited 458 times, 1 visits today)