


July 14, 2012
DIY Project: Installing a Ceiling Fan
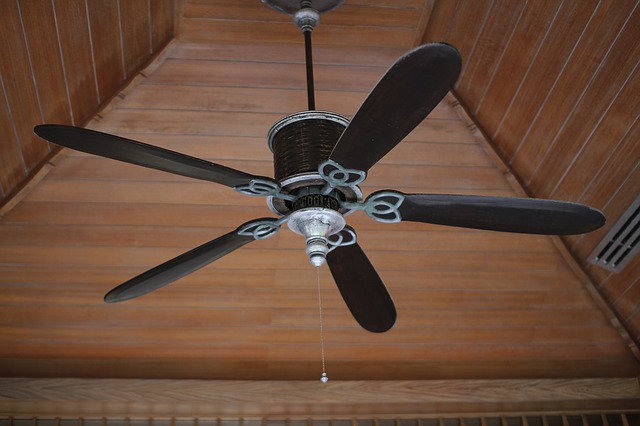
Updating light fixtures in a master bedroom can make a huge difference on the look and feel of the room. While looking at the different lighting options consider adding a ceiling fan. Ceiling fans effectively circulate the air in a room to create a draft throughout the room. If you use air conditioning, a ceiling fan will help you save energy. Turning on the fan lets you raise the thermostat setting about 4°F and still stay cool.
Replacing an existing light fixture with a fan is a simple, one-day task. Before you start it is important to know that you can’t hang a fan from the existing electrical box. You must either use a specially rated hanger and box to mount the fan between joists or, screw a fan-rated “pancake” box directly to a ceiling joist. Learn the steps to ceiling fan installation below.
Shopping List
- Fan-rated 1/2-inch-deep pancake box
- Medallion (made of rigid foam, not plaster, which may crack)
- Fan blades
- Fan motor
- Light-fixture housing
- Lamp shades
- Down rod, canopy, and ceiling plate (all included in fan kit)
- Remote-control transmitter with 9v battery
- Twist-on wire connectors
- Caulk or spackling compond (for filling nail holes in medallion)
- 6D finish nails (for attaching medallion to ceiling)
- Latex paint or acrylic spray (optional)
Instructions
1. Turn off power at breaker
After you turn off the power mark it with a DO NOT TURN BACK ON sign. Use circuit tester to make sure power is off to old fixture.

2. Remove old fixture.
Unscrew the nuts or screws holding the current fixture to the ceiling. Lower the fixture and disconnect the wires by twisting off the plastic connectors from the ends of the wires.

3. Remove the box and cut a new whole.
Before starting this step get your vacuum cleaner ready. Remove the old electrical box from the ceiling. If it’s nailed to a joist, pry it free with a flat bar. If it’s suspended from a bar, you may have to take off a metal plate to unscrew the box; then pry the bar from the joists. While doing this have your assistant use the vacuum cleaner wand to suck up debris
Hold a 1/2-inch-thick pancake box against the ceiling, centered on a joist, and trace around it with a pencil. Cut along the line with a drywall saw. Clean with the vacuum after you saw.

4. Install new, heavy-duty electrical box.
Feed the electrical cable coming from the ceiling through the knockout hole in the pancake box. (Be sure there’s a cable connector attached to the knockout hole.)
Set the box into the hole cut through the ceiling and press it tight against the underside of the joist.Attach the box to the joist with the two 1 1/2-inch No. 10 hex-head screws provided. Drive in the screws with a drill/driver equipped with a 5/16-inch nut-driver tip.
Wrap the cable’s bare copper wire around the grounding screw inside the box. Allow the wire end to hang down.

5. Attach new ceiling medallion
Apply a small bead of urethane-based adhesive to the back of the ceiling medallion.
Pass the wires through the medallion. Center the medallion on the pancake box and press. Fasten it with four 6d finishing nails driven into the joist. Set the nail heads and fill with caulk or spackle.

6. Mount the Ceiling Plate
If you want to paint medallion paint it before installing the ceiling paint. Hold the fan’s metal ceiling plate up to the pancake box and pull the wires through its center hole.
Attach the ceiling plate to the box with two 1 1/2-inch-long 10-32 machine screws.

7. Assemble the Fan
With the fan on the floor, feed the wires coming from the motor through the center of the canopy. Set the canopy on top of the motor. If pipe’s threads have a factory-applied coating. Don’t remove this coating; it keeps the pipe from unscrewing. Next, pass the wires through the hollow down-rod pipe.
Thread the down-rod pipe into the top of the motor. Use a wrench to tighten the square-head locking screw on the side of the pipe.

8. Connect the Wires
Hook one side of the canopy onto the ceiling plate.Using twist-on wire connectors, join the two green wires to the bare copper wire coming from the cable. (If your room is wired differently from the one shown here, consult a licensed electrician.)
Join the two white wires. Then connect the two black wires. Swing the fan up into position against the medallion and secure it with the two canopy screws.

9. Add Blades and Lights
Attach each fan blade to a blade iron (the bracket that holds the blade to the fan). Then, fasten the blade irons to the motor with the screws provided. Plug the fan’s light-fixture housing into the wire hanging from the underside of the fan’s motor.
Install the shades and lightbulbs. Screw the plastic holder for the remote control to the wall beside the wall switch.
10. Restore power.
After you do a final check to make sure things are secure, turn back on the power. Test out the light and fan.
(Visited 62 times, 1 visits today)